Fantastic Binocular Telescopes
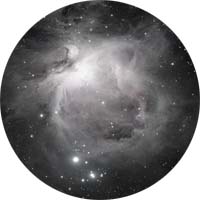
Seeing with both eyes is a very natural act in everyday life. Our brain is made to process the information obtained from the left and right eyes and to recognize it stereoscopic. Binocular telescopes can make us to use this brain function as it is.
The Great Orion Nebula (M42), 1,300 light years away and with no parallax originally, can be recognized as a stereoscopic image through binocular telescopes. Of course this is a visual illusion, but the binocular telescope observers feel comfortable with this pseudo-three-dimensional feeling, dreaming about the space region where this huge nebula exists. Brighter stars are seen in front and darker stars behind - you'll feel the depth of the universe with a mysterious perspective. Once you have used binocular telescopes to observe deep-sky objects, you will easily understand these expressions are not exaggerated.
How to enjoy Binocular Telescopes
The general ways to enjoy binocular refractors are low-to-middle power observations. They will satisfy the desire "I want to see it more up!" you often feel when seeing deep-sky objects with small handheld binoculars.
The most exiting objects are relatively bright nebulae or star clusters, such as Messier objects, or lunar surfaces. With an auto-guided mount, high-power planetary observations are also enjoyable. It's beyond imaginations to raise the ability of recognizing the object's details by seeing with both eyes.
Besides, binocular telescopes (and the owner) should be a "favorite" at star parties. You can share the moving impression of witnessing the live universe with your colleagues on the spot.
How to set up Binocular Telescopes
The general process to set up the binocular telescopes is following:
1. Tripod Setup2. Mounting & Telescopes Setup
3. Attaching EZM's
4. Balance Adjustment
5. Interpupillary Distance Adjustment
6. EZM's Mirror AdjustmentHereunder, the detailed explanation for each article follows.
1. Tripod Setup

Usually binocular telescopes are used with an altazimuth mount, so the top surface of the tripod must be leveled properly with a spirit level - a low-cost one is enough, such as the minimum sensitivity gradient of 1/50 to 1/100.
2. Mounting & Telescopes Setup
No special points to be noted. Just take care not to drop each unit. Also pay attention not to break the balance during assembly.
3. Attaching EZM's
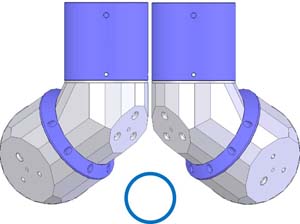
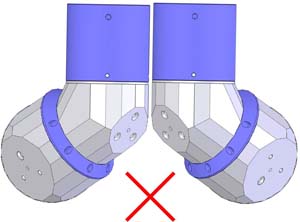
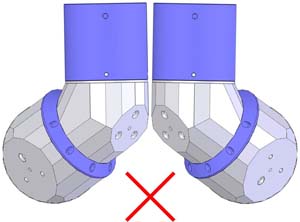
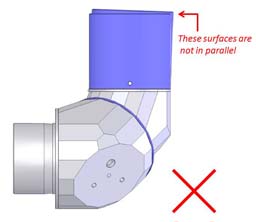
Attach EZM's precisely so that both the eyepiece holders will be exactly in parallel and on the same height. In case it's difficult for you, using our EZM Parallelizing Device is recommended.
If both the eyepiece holders seen from the side can't be in parallel anyhow, the reason will be either the focuser is tilted or EZM is not well aligned (the torsion angle is not exactly 70.53-degrees.)
4. Balance Adjustment
Especially for friction-control altazimuth mounts, keeping good balance is very important. It's necessary to adjust the balance in both the telescope positions as horizontal and vertical.
Balance adjustment in horizontal position is by moving the telescope tubes forward or backward.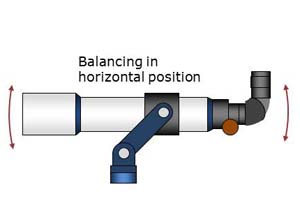
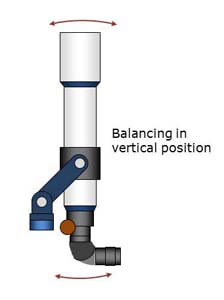 Balance adjustment in vertical positon is by either adding counterweights or changing the positons of the side bearings. It's nearly impossible to do this work at the observing spot, so it's essential to make sure to adjust well beforehand.
Needless to say, all the necessary accessories like eyepieces and a finderscope should be installed when adjusting the balance. Also the retractable dewcap should be extended.
5. Interpupillary Distance Adjustment
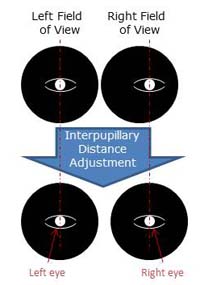
As the interpupillary distance varies from person to person, a fine adjustment is necessary to see binocular telescopes with both eyes. The adjusting procedure is following:
Firstly, insert both the eyepieces and see through the binocular telescopes, then a round field appears in each eye. At this point, it doesn't matter if it's well focused or not.
Secondly, close one of your eyes and move your face so that the round field in the opened eye comes to the exact center of it. Once your face position is fixed, reverse the closing eye and see if the other eye is on the exact center of the round field. If it's on the center, too, the interpupillary distance is correctly adjusted. If not, turn the adjuster knob so that it will be centered. (See "Technology" page for the details of the interpupillary distance adjustment mechanism.)
*Notice: The interpupillary distance adjustment should be performed more accurately as the magnification becomes higher. The maximum tolerance is the same figure as the exit pupil diameter.
For example, when using 8mm eyepiece with a D=100mm f/8 telescope, it yields 100x and the exit pupil diameter is: 100mm/100 = 1mm. In this case, an observer with 62mm interpupillary distance should adjust that of the binocular telescopes to 62mm ± 1.0 mm.
6. EZM's Mirror Adjustment
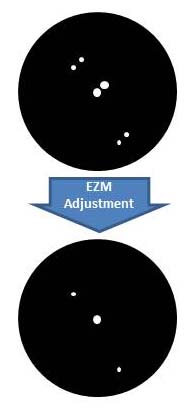
Once the interpupillary distance adjustment is completed, the final is the EZM adjustment - with this work, the left and right images to be merged. Please note that the optimum angle of the mirrors also differs subtly from person to person.
Look through the binocular telescopes and focus both right and left to infinity. Then, aim a bright star and introduce it in the middle of the right (or the left) field of view. If the star seen with both eyes overlaps one on the other, EZM adjustment is already completed.
If the two star images do not merge well, operate the two adjusting screws on the bottom of the right EZM unit so that the two images will merge exactly. One screw is a vertical direction adjuster, and the other is horizontal.
So far, the setting of the binocular telescopes is completed.
[Notice (1)] When doing this adjustment in daytime, be sure to aim the object of 100-meter or more away. In shorter distances, it will cause field rotation due to parallax. The farther objects are the better.
[Notice (2)] Be careful not to adjust the EZM with such an eye direction as seeing the close objects (like the stereoscopic crossing method.) Adjusting with this sight condition will cause the horizontal shift of the field of views when seeing the infinity objects like stars. It is a key of EZM adjustment to do with a sight condition to look far.


